

Out of the Comfort Zone
Stepping outside of your comfort zone is the hardest, and best, thing you can ever do for yourself.
Recently I took a new leap into my journey as a hair artist, and it has taught me a lot about myself, and what we all are really capable of if we push ourselves outside of our comfort zones. Over the years in this industry I have been lucky enough to work with some truly wonderful people and companies, but in the past few years I have come to really appreciate and see the depth of what L’Oreal Professionnel brings to the world of hair. Now, this isn’t a sales’ pitch, I promise, I merely just to share my recent experiences with this company and the transformative personal growth that they have brought me. I really think that important insights can be taken from my experiences, not only for those inside the beauty industry, but also for anyone simply wanting to change how they see the world and the people in it.
I have learned throughout life that allowing my creative side to flourish is the foundation of happiness for me. What began as art and music classes growing up, was followed by years practicing interior design in Chicago, and has now led to me exploring my inspirations with hair and color. This passion has over time honed in on a specific company, who I feel are one of the great global leaders in technology and innovation: L’Oreal Professionnel. They offer a unique opportunity to spread the joy that being creative gives me, and present a path for their artists to evolve, grow, and connect to others of like mind and spirit. So I took a leap of faith and decided to try to join this inspiring company.

The whole process started by first putting together an audition video, passing an interview, and then receiving a formal invitation. The invitation itself was a prestigious (and terrifying) offer to join a group of talented artists and immerse myself into the fascinating world of L’Oreal Professionnel alongside them. For six days I sat with people who were initially strangers, but are now friends, as we shared our fears, learned technical information, vocabulary, and presentation techniques and skills that pushed us all way past our personal comfort zones.
Outside of the technical aspects of this program, there were things I learned that I feel are universal to success and happiness in life for everyone. First is that no matter what our background is, we all possess a drive that is really not that different from those around you. I sat in a room of incredibly talented individuals and realized that everyone has something to contribute to the world, and that one’s past experiences are just as important in their journey as the person next to them, no matter how minor they may initially seem.

To learn that Glenda is Trisha Yearwood's stylist, and Michelle works on the set of Nashville, and Mary Jo was just featured in a magazine spread, to the inspiring tales of getting to work with the incredible Jo Blackwell and countless other nationally known artists in our industry. Don’t ever discount the life experiences of the person sitting next to you, because as big or small as it may seem to you, I am quite sure that you will learn something from them if you just open up to it.
But the most important thing I learned there is that stepping outside of your comfort zone is the hardest, and best, thing you can ever do for yourself. I will always remember when David Brown, the director of Columbus Harmony Project Choir, told me, “When I have been given choices along life's journey, one being a comfortable safe choice and the other uncomfortable, which ultimately stems from fear, I choose the uncomfortable choice.”
This choice I made to expand my thinking and challenge my fears alongside my fellow artists at L’Oreal Professionnel has changed my life and really allowed me to grow. I feel so grateful for this experience, the tremendous people I’ve met through it, and who it has helped me become, both professionally and personally. Recently a client asked me how my trip was and I told them that it was simply the hardest and most rewarding experience I’ve had in my career.
I really can’t wait to see what happens from here.
For more information on Jody D. and the Jody D. Salon visit www.jodyd.com, and get daily tips, trends, and insider insight by liking on Facebook and following on Twitter and Pinterest.

Let's Talk Red
From subtle strawberry to fiery fuchsia, red can give you a little extra saunter in your step, a little spice in your personality, and a new, lively outlook on the future.
Ah, redheads. They’re rare, they’re spirited, and for better or worse, everyone seems to have an opinion about them. If you’re not in the 2% of the world’s population that naturally rocks the red, then you may have wondered if you could (and should) pull off a copper coif. Well chances are, you can, and in doing so you might just fall in love with the inner vixen that your new red hair brings out in you.
However, red is a little trickier than other hues. It needs more attention and upkeep to stay looking polished, and you have to be a little more thoughtful when choosing your red to make sure it will accompany your skin tone nicely. The same shade of red will look completely different on people with light, medium, or olive skin tones. So choose wisely, you want your red to complement, not clash, with your complexion.
A light skin tone is often best paired with a lighter, warmer tone of red. A nice light strawberry blonde is a great choice. If you’re already a fair-skinned blonde, then just weaving in some strawberry color into your natural hair is a perfect way to introduce yourself to the world of red without taking too big of a leap.
With a medium skin tone, consider a corresponding medium red tone for your hair. Make sure the red isn’t too dark though, as this will cause your skin to appear washed out. I like to go one shade darker than your natural hair color and incorporate an auburn tone. Or better yet, I love to use a color panel technique that creates a real subtle, yet striking, flow of color through the hair.
If you have a warm skin tone then you have the most options for trying out different hues of red, so then it comes down to preference and just how much you want to stand out. If you’re feeling vivacious, you can get a little more punch by introducing a cooler tone of red, or keep it subtle with a warmer tone of red for those who want a change, but don’t want to live in the spotlight.
If you have an olive skin tone, you’ll look best with a cooler, richer shade of red. The cool red will appear darker and have a little more depth when paired with a warm complexion. Even if you have a naturally dark shade of hair, you can look fabulous by going a level deeper and weaving in a cool shade of red. This will create a gorgeous sun-kissed appearance when the red reflects in the sunlight. This is a beautiful and fun way to play with a little red without all the commitment.
Once you’ve figured out what hue is right for you, just remember that bringing a little dose of red to your life does require some extra attention to care. The red molecule is well maintained by using a color shampoo designed to help keep the pH level of your hair in balance, and to lock in your color for longevity. Of course, if you’re out in the sun, putting a cover on your gorgeous hair is incredibly helpful to keep those UV rays from fading your color. (And you might just look extra stylish at the same time)

If you’ve already gone red and want to mix it up a little, there are certainly options to keep you looking feisty, but fresh. You can highlight throughout to break up the red hues and create more dimensional color; this will give your hair an overall brighter appearance. Another option is to ask your stylist to create a more neutral tone by applying a complimentary color that will bring richer neutral notes to the hair.
It is highly recommend that when making any substantial color change you should sit with your stylist and walk through the options to better plan your approach, time, and expectations. It may take a little extra time and care, but no one ever said being a redhead was easy, they just said it was fabulous.
So even though you may think red is only for the bold, don’t be afraid to try it, you may really surprise yourself. From subtle strawberry to fiery fuchsia, red can give you a little extra saunter in your step, a little spice in your personality, and a new, lively outlook on the future.
As a L’Oreal Professional Artist, I have worked with some truly fantastic products that can make all these changes possible. Whether you’re looking to dye, highlight, or maintain your new crimson color, I have just the right product to make you look simply stunning in your radiant red.
If you're looking for a little more inspiration, be sure to check out our 'Fiery Redheads' board on Pinterest.
For more information on Jody D. and the Jody D. Salon visit www.jodyd.com, and get daily tips, trends, and insider insight by liking on Facebook and following on Twitter and Pinterest.

Blow Dry Beautiful
Choosing the right brushes are essential to completing this look successfully, as well as avoiding the risk of getting a brush stuck in your hair.
Round brushing is an important key to a voluminous, sexy blowout, but it’s also something that too many are fearful to attempt outside of the salon chair. This technique is often intimidating to people, but with the right tools and a little practice, you can recreate that gorgeous and professional ‘just left the salon’ look at home.
The Tools
Let’s start off with the tools you’ll need. Aside from the requisite hair dryer, I have found that the best tools to use during a blow dry to achieve shiny, bouncy hair are a combination of a detangling brush and a bristle round brush.
Choosing the right brushes are essential to completing this look successfully, as well as avoiding the risk of getting a brush stuck in your hair. (We’ve all heard the horror stories)
Unless you’re in the market for a surprise cut, investing in the proper tools is incredibly important.
My go-to detangling brush is a classic Denman D31. It consists of a flexible red rubber base, with seven rows and eleven bristles per row. Its wide teeth placement rubber base allows for easy detangling and is a fantastic start for getting luxurious volume in the hair.
The next tool you’ll need is the round brush. I personally choose a brush by Regincós. This brush is a favorite due to the wooden core, natural boar bristle barrel, and lightweight cork handle. The wooden core doesn’t overheat and won’t cause damage to your hair, and the boar bristles aid in smoothing the cuticle layer, distributing styling product and the hair’s natural oils, and will not tangle like nylon bristle brushes. The tension is firm, but doesn’t pull too hard. I use this particular brush to not only create bend, but to “set” the hair like a roller, making it ideal to use for a polished blowout.
The Technique

Preparation: I begin with towel dried hair and add the appropriate product before I begin the blow dry. This will insure a more polished result whether you are looking for a full volume lift or sleek and glossy locks.

Step 1: Using the Denman D31 detangling brush, I begin in front of the ear and pick up hair along the hairline while blowing drying as I lift the brush out, up, and away, straight off the frame of the face. I continue this along the hairline and complete on the other side of the face. The benefit of this is literally creating a lift off the face and creating an impactful frame with the hair.

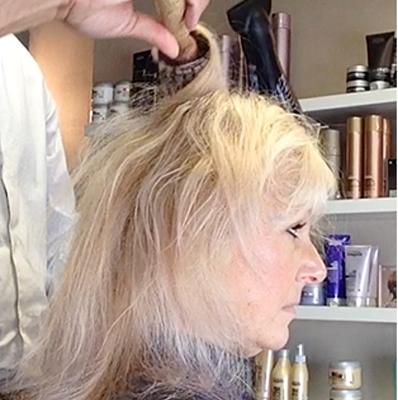
Step 2: The reminder of the hair is then blown dry with just my hand. I lift the hair up and away, straight off the scalp while blow drying to create more body and volume with the hair. You can even consider tipping your head forward and flipping your hair toward the floor and drying. This step is complete when the hair is 85-100% dry. You should be left with lot of volume and relatively or completely dry hair. Remember, this step is all done with your hand and not a brush.

Step 3: Next start with making a horse shoe-shaped part from ear to ear and clip the remaining hair up, leaving down the hair underneath the parting. Then, using your round brush, separate into manageable sections and blow dry by simply pulling the round brush from scalp to ends.
Step 4: Then bring more hair down using a horse shoe-shaped part again, this time from the temples of your head. Continue with the same blow drying approach using the round brush, but this time come off the head in a slight upward angle. When you reach the end of the hair, turn the brush under and roll the hair back to the scalp. Let it cool for about 15 seconds and then remove the brush. Complete this around the whole section.

Final Step: The remaining section is now the hair at the crown of your head. Start with a segment at the back of the crown, brushing in the same direction as your shoulders. The hair will be in front of the brush as you look in the mirror. Blow dry the remaining crown section by moving the brush and dryer straight up from the scalp and heating the hair. Do this a couple of times before bringing the brush forward toward your face. When you reach the end of the hair with the round brush, carefully roll the hair in the brush down to the scalp. Rest the brush and let it cool for 15-30 seconds, then gently unwind. We call this an on base roller set. It allows the hair to set and create maximum lift off of the scalp. Repeat this process for each remaining segment working toward the front hairline.
And a Few Tips to Consider
- Smaller brushes create a more wavy result, while larger brushes are perfect for a smoother straighter style.
- For volume, spray a mist of light hair spray while when hair is wet, and then add your favorite volumizing mouse for a little extra boost of hold.
- For a less voluminous, more smooth and silky blowout, consider using a smoothing cream or serum. I really like a bit of L’Oreal Mythic Oil.
- If you want to kick your blowout up a notch, after heating up each section of hair use a Velcro roller to roll back into the section instead of the brush. Leave the rollers in for the duration of your beauty routine and remove at the very end for and even longer lasting hold.

When you’re done, you’ll have a simply stunning style that will inspire, impress, and make everyone wonder how on earth you can manage to make it to the salon for a professional blowout so often.
For more information on Jody D. and the Jody D. Salon visit www.jodyd.com, and get daily tips, trends, and insider insight by liking on Facebook and following on Twitter and Pinterest.

Texturizing Your Way to Gorgeous
Whether your hair is fine, thin, thick, coarse, kinky, or somewhere in between, there is a texturizing technique that will allow your stylist to give you a fantastic cut that will help you come to peace with, if not learn to love, your natural texture.

Your hair’s texture is easily one of the most notable but sometimes discouraging things about it.
Your hair’s texture is easily one of the most notable but sometimes discouraging things about it. Unlike color, length, and style, hair texture is not so easily changed. But while your thin hair will remain thin, and your coarse hair will stay coarse, there are salon techniques that can be used to make the most of your dreaded natural texture and to give your hair a fresh look that you didn’t think was possible.
Clients quite frequently express frustrations to me, saying things like: “This side seems thicker than the other.” “My hair keeps falling flat.” “My hair is so thick, what can we do?” or “This fine hair doesn’t have any volume.”
More often than not, they are really referring to issues connected with the texture of their hair. And when we talk about texture, we are covering a lot of territory dealing with precise cutting and styling techniques. Because of this, it becomes essential to have someone on your side with the proper skills, knowledge, and expertise to help you work through your texture concerns.
From a stylist’s point of view, there are several ways that a certain texture can be created or altered. We can:
- Take out weight or bulk
- Soften the edges of layers; and
- Utilize texture shears, razors, and cutting shears
Though which of these techniques and approaches is used will all depend on the hair type and what the stylist is trying to accomplish for the client.
If you have long, thick hair, it can be softened up by a chipping technique that allows the stylist to use cutting shears and methodically chip through the hair to take out internal weight. I often use this technique with clients who have long, thick, straight hair so I can create a more flowing and soft overall feel. It’s like creating layers within the hair and loosening up the weight without actually showing the deliberate layered edges.
If you want to showcase layers, long layers will create movement and style, though sometimes the layers created may look like blunt rows. Your stylist can soften up the harsh bluntness of the layers by simply going into the hair with a point cut and creating gaps towards the ends so they lay more gently with softer edges.
If going shorter, the classic bob cut is created with a design edge and many times the line can have a very weighted feeling, which initially might not make this popular cut ideal for every texture type. To combat this heaviness, I often take a texture shear (shears with many teeth, allowing for partial removal of hair) and point from the edge of the hair straight back into the interior and remove bulk, about 1-3 inches, from the ends.
This approach is done in sections all around the perimeter and leaves a really soft edge to shorter cuts like the bob or pixie. This texturizing technique also creates a more tapered shape when needed and allows the client to wear their new look smooth, or with a little product so they can achieve a fun tousled feel to the ends.
On the other end of the texture spectrum, fine hair can also benefit from texture techniques. Creating shorter hairs within the cut can lift the longer hair and help to maintain volume longer. With fine hair, I especially feel that texture approaches should be analyzed and examined with detailed thought. There is less room for error with thinner hair, and only an expert will have the training needed to texturize precisely so that your thin hair gets a lift instead of looking patchy or undone.
Whatever your hair type, make sure that there is a clear line of communication between you and your stylist when undergoing a new texture process so that they can achieve the best result possible and you can leave happy. I never want a client to be uncomfortable when I begin these technical techniques on their hair, because while they are transformative, they might also seem a little complicated and scary if not approached correctly.
So whether your hair is fine, thin, thick, coarse, kinky, or somewhere in between, there is a texturizing technique that will allow your stylist to give you a fantastic cut that will help you come to peace with, if not learn to love, your natural texture.
For more information on Jody D. and the Jody D. Salon visit www.jodyd.com, and get daily tips, trends, and insider insight by liking on Facebook and following on Twitter and Pinterest.

What’s My Best Length: Factors to Consider
There are no set rules for hair length anymore. No one is bound to a certain length by their age, profession, or even motherhood. We can all go long, short, or somewhere in between, but there are important factors to consider when making the choice whether to cut or grow.
There are no set rules for hair length anymore. No one is bound to a certain length by their age, profession, or even motherhood. We can all go long, short, or somewhere in between, but there are important factors to consider when making the choice whether to cut or grow.
Before embarking on a new cut, I ask my clients, “How much time do you spend styling your hair in the morning?” This simple question is actually multiple questions in one that are necessary to figure out what cut would work best for every aspect of YOU.
Do you like to wash and go, or is taking time for blow-drying and using hot tools more of your routine? Do you always put a suit, or is your day-to-day less restrictive? Once we begin to figure out what’s ideal for your lifestyle, from there I look at texture, density, growth patterns, face shape, and even more factors to clarify what length will be best for you.
Let’s start with short hair cuts. A lot of women are scared to take the leap and go short, but this length can be ideal if you really want your facial features to pop. If you’ve got gorgeous eyes or prominent cheekbones, a short cut is often the best way to showcase them. Fine, thin hair works especially well with a short, layered cut, because while long styles often highlight the thinness, going short can make your hair look fuller, thicker, and healthier. For this style, I like enough length to be able to bend around a small round brush.
For medium to thick hair, a short, shaggy, layered cut can be an easy morning wash and go hairstyle.
If a tidy pixie or short bob aren’t your style, you may consider going for a medium length cut. Medium length hair works wonderfully on so many people. It’s still short enough to be able to cut into a defined style to give you a distinct look, yet long enough to provide a little more versatility.
If you want to look chic and edgy, a blunt design line at this length can really make an impact. And if you want to maximize fullness, a medium length cut with layers can be ideal, because once you go longer, the weight of extra length will begin to pull some of the fullness and bounce out of your hair.
If you’re going to work every day in a suit, medium length hair will always appear professional and stylish without too much fuss.
Lastly there is long hair. I have clients with thick, course hair and a longer length is often the best option for them. If your hair is wavy, curly, or even straight, the length adds to the weight and can be very helpful in maintaining a much more manageable hairstyle. With curly, course hair, adding layering throughout will keep a better shape and the length will give more control to the curl.
Thick hair is often at its best long. The length keeps the width proportional to avoid the dreaded ‘mushroom effect’ that can happen when someone with thick hair gets the wrong short cut. The long length is ideal if you really want a lot of versatility in your hair and have the time each day to play with your locks.
The length and cut of your hair can really make or break your look. In the end, all of these factors and more go into deciding the best length for you, and an experienced stylist will know how much to cut to hit just the right note.
For more information on Jody D. and the Jody D. Salon visit www.jodyd.com, and get daily tips, trends, and insider insight by liking on Facebook and following on Twitter and Pinterest.

Working With Your Hairstylist
Hair is a very personal part of our look. We have a deep attachment to it. Hair conveys our persona and individuality, like a signature outfit you never take off. And a key to achieving the best style for you is through a relationship of communication with your stylist.
Hair is a very personal part of our look. We have a deep attachment to it. Hair conveys our persona and individuality, like a signature outfit you never take off. And a key to achieving the best style for you is through a relationship of communication with your stylist.
One favorite tool of communication in the salon is a picture. A picture does after all say a thousand words. I have had a few clients tell me that their stylist didn’t like pictures of hairstyles. For what reason, I could never guess, since they are a visual asset in this business.
I encourage photos of any kind because they can convey many different elements of a style you want to achieve. Be prepared to express what you like about the photo; is it the layers, the length, the movement, the color and low-lights? Explore every direction you can so we can achieve the best result together. Communication, in our profession, is essential to the success of your experience, and a photo can add a lot of clarity to your words.
Another way to better your salon experience is to share your styling routine with your stylist. For instance, how much time are you willing to dedicate to styling on a daily basis? This information can be the difference between choosing a cut that requires precise flat ironing to keep it sleek or a carefree wash and wear style. And a great stylist will share their expertise styling tips to make your morning routine easier.
Be open to styling & finishing products because this can make all the difference in the world. On rare occasions I’ve had a client say, “I don’t like any product in my hair.” I will always work within those guidelines, but truthfully, professional styling combined with finishing products are just like the culinary ingredients needed to make a perfect dish. I read a quote once, from Meg Ryan’s hairstylist, who said, “A great hairstyle is 50% haircut and 50% product.” I’m not sure if I personally agree with those exact proportions, but it’s really pretty close. Creating long lasting volume or a silky smooth finish can be achieved with great ease when using the right product.
I make sure my clients know what shampoo, conditioner, and style products I use through the steps of their hairstyle. What I choose has a purpose specifically for them and their lifestyle. Stylists truly want you to be able to recreate your look after you leave the salon chair, and given the right tools, you will look fantastic every day.
In the end, your hairstylist is a licensed professional, and making a connection through honest and open communication is just as important as communicating with your doctor, lawyer, or dentist. Get to know your stylist and express your expectations, your concerns, your wishes, and your challenges. Then let the expertise of your stylist create the perfect cut and color to best suit you.
For more information on Jody D. and the Jody D. Salon visit www.jodyd.com, and get daily tips, trends, and insider insight by liking on Facebook and following on Twitter and Pinterest.